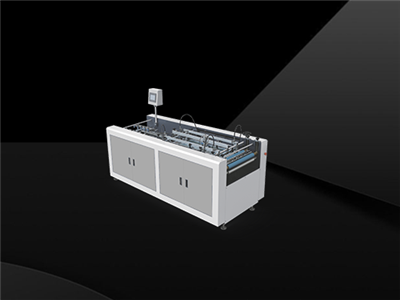

Hey there! As a supplier of Rigid Box Machines, I'm super stoked to walk you through the installation process of these bad boys. Whether you're a newbie in the packaging game or looking to upgrade your existing setup, understanding how to install a Rigid Box Machine is crucial. So, let's dive right in!
Pre - installation Preparations
Before you even think about getting your hands dirty with the actual installation, there are a few things you gotta take care of. First off, you need to find the perfect spot for your machine. It should be a well - ventilated area with enough space around it for easy access and maintenance. The floor needs to be level and strong enough to support the weight of the machine. You don't want it wobbling around during operation, right?
Next, make sure you have all the necessary tools on hand. You'll typically need wrenches, screwdrivers, and maybe some measuring tools. It's also a good idea to have a copy of the installation manual handy. This manual is like your bible for the installation process, so keep it close.
You should also check the power supply. Rigid Box Machines usually require a specific voltage and frequency. Make sure your electrical system can handle it. If you're not sure, it's best to consult an electrician. And don't forget about water and air supply if your machine requires them. You'll need to connect them properly to ensure smooth operation.
Unpacking and Inspection
Once you've got everything ready, it's time to unpack the machine. Be careful when opening the packaging to avoid any damage. As you unpack, check all the parts to make sure nothing is missing or damaged during transit. If you find any issues, contact us right away. We'll sort it out for you.
Inspect the machine for any visible signs of damage, like scratches or dents. Also, check the moving parts to make sure they're not stuck. This is a good time to clean the machine if there's any dust or debris on it.
Assembly
Now, let's start assembling the machine. The assembly process can vary depending on the type and model of the Rigid Box Machine. But generally, you'll start with the base. Place the base on the prepared floor and use the leveling feet to make sure it's perfectly level.
Next, attach the main body of the machine to the base. This usually involves using bolts and nuts. Make sure you tighten them properly, but don't over - tighten as it can damage the parts.
After that, you'll need to install the different components like the feeding system, the forming system, and the cutting system. Follow the instructions in the manual carefully. Each component has its own specific installation steps.
For example, when installing the feeding system, you'll need to align it correctly with the other parts of the machine. This ensures that the materials are fed smoothly into the machine. The forming system is where the boxes take shape, so it's important to install it accurately. And the cutting system needs to be sharp and properly aligned to make clean cuts.
Electrical and Pneumatic Connections
Once the mechanical assembly is done, it's time to connect the electrical and pneumatic systems. Start with the electrical connections. Make sure you turn off the power supply before you start. Connect the wires according to the wiring diagram in the manual. Double - check all the connections to avoid any short circuits.
For the pneumatic connections, if your machine uses compressed air, connect the air hoses to the appropriate ports. Make sure the connections are tight to prevent air leaks. You may need to adjust the air pressure according to the requirements of the machine.
Testing and Calibration
After all the connections are made, it's time to test the machine. But before you turn it on, do a final check of all the connections and parts. Make sure everything is in place and tightened.
Turn on the power supply and start the machine. Listen for any unusual noises. If you hear any rattling or grinding sounds, stop the machine immediately and check for the source of the problem.
You'll also need to calibrate the machine. This involves adjusting the settings to ensure that the boxes are made to the correct size and shape. You may need to adjust the feeding speed, the pressure, and the cutting length. Use the control panel on the machine to make these adjustments.


Training and Support
Once the machine is up and running, we offer training for your operators. Our technicians can come to your site and train your staff on how to operate the machine safely and efficiently. We'll also provide you with maintenance tips to keep your machine in top condition.
If you ever run into any problems with the machine, our support team is just a call away. We're committed to providing you with the best after - sales service.
Related Machines
If you're interested in expanding your packaging capabilities, we also offer other related machines. Check out our Automatic Tape Pasting Machine, which can help you with the corner pasting process. Our Automatic Box Making Machine is a great all - in - one solution for making rigid boxes. And if you're looking for a more budget - friendly option, our Semi Auto Corner Pasting Machine might be the right choice for you.
Conclusion
Installing a Rigid Box Machine may seem like a daunting task, but with proper preparation and following the instructions, it can be a smooth process. We're here to support you every step of the way. If you're thinking about purchasing a Rigid Box Machine or have any questions about the installation process, don't hesitate to contact us. We're eager to help you take your packaging business to the next level.
References
- Manufacturer's Installation Manual for Rigid Box Machines
- Industry Best Practices for Packaging Machine Installation