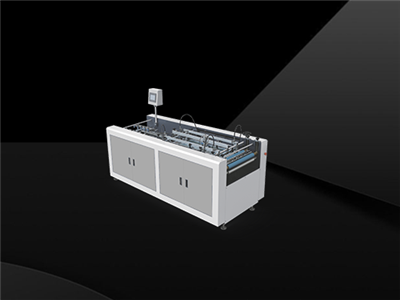

Hey there! As a supplier of Rigid Box Making Machines, I've seen my fair share of situations where machine parts need replacing. Whether it's due to wear and tear, a sudden breakdown, or just an upgrade, knowing how to replace parts of a rigid box making machine is super important. In this blog, I'll walk you through the process step by step.
Why Parts Replacement is Necessary
First off, let's talk about why you might need to replace parts in the first place. Over time, the continuous operation of a rigid box making machine can cause parts to wear out. For example, the blades in a Round Corner Cutting Machine can get dull after cutting through countless pieces of cardboard. Dull blades not only make the cutting process less efficient but can also lead to poor-quality cuts, which is a big no - no in the box - making business.
Another reason could be technological advancements. Newer parts might offer better performance, higher precision, or increased automation. By replacing older parts with the latest ones, you can keep your machine up - to - date and competitive in the market.
Preparation Before Replacement
Before you start replacing any parts, there are a few things you need to do. First, gather all the necessary tools. This might include wrenches, screwdrivers, pliers, and maybe some specialized tools depending on the part you're replacing. Make sure these tools are clean and in good working condition.
Next, refer to the machine's manual. The manual is your best friend when it comes to replacing parts. It will have detailed diagrams and instructions on how to disassemble and reassemble the machine safely. If you don't have the manual handy, most manufacturers offer digital versions on their websites.
It's also a good idea to have the replacement part ready. Make sure it's the correct model and compatible with your machine. Double - check the specifications to avoid any headaches later on.
Step - by - Step Replacement Process
Let's start with the actual replacement process. I'll use the example of replacing a worn - out belt in an Automatic Corner Pasting Machine.
Step 1: Power Off and Lockout
The first and most important step is to turn off the machine and disconnect it from the power source. This is crucial for your safety. Use a lockout - tagout procedure to prevent anyone from accidentally turning the machine back on while you're working on it.
Step 2: Locate the Part
Once the machine is safely powered off, locate the belt that needs to be replaced. In an automatic corner pasting machine, the belt is usually in a visible area, but you might need to remove some covers or panels to access it. Refer to the machine's manual for the exact location.
Step 3: Remove the Old Part
Use the appropriate tools to remove the old belt. This might involve loosening some tensioners or removing clips. Be careful not to damage any surrounding parts while you're doing this. Once the old belt is removed, take a good look at it to see if there are any signs of what caused it to wear out. This can help you prevent similar issues in the future.
Step 4: Install the New Part
Take the new belt and carefully place it in the same position as the old one. Make sure it's properly aligned and tensioned. Follow the instructions in the manual to adjust the tension correctly. If the tension is too loose, the belt might slip, and if it's too tight, it can put extra stress on the motor and other components.
Step 5: Reassemble and Test
After the new belt is installed, reassemble any covers or panels that you removed earlier. Then, reconnect the machine to the power source and turn it on. Run a test cycle to make sure the new belt is working properly. Check for any unusual noises, vibrations, or malfunctions. If everything seems okay, you're good to go!
Replacing More Complex Parts
Replacing more complex parts, like the cutting head in a Round Corner Cutting Machine, requires a bit more expertise.
Step 1: Technical Assessment
Before attempting to replace a complex part, it's a good idea to have a technical assessment done. This can be done by a professional technician or an in - house expert. They can determine if the part really needs to be replaced or if there's a simpler solution, like a repair.
Step 2: Disassembly
If the assessment shows that the part needs to be replaced, start the disassembly process. This might involve removing multiple components and following a specific sequence. Take your time and keep track of all the parts you remove. You can use a labeled container or a diagram to help you remember where everything goes.
Step 3: Installation and Calibration
Install the new cutting head carefully, making sure it's properly aligned and secured. After installation, you'll need to calibrate the cutting head. This involves adjusting the cutting depth, speed, and other parameters to ensure accurate and consistent cuts. Refer to the machine's manual for the calibration procedure.
Maintenance After Replacement
Once you've replaced the part, it's important to perform regular maintenance to keep the machine in good condition. This includes cleaning the machine, lubricating moving parts, and checking for any signs of wear or damage. By maintaining your machine properly, you can extend the lifespan of the new part and prevent future breakdowns.
When to Call in a Professional
Sometimes, replacing parts can be too complex or dangerous to do on your own. If you're not confident in your abilities or if the part is a critical component of the machine, it's best to call in a professional technician. They have the experience and knowledge to handle the replacement safely and efficiently.
Conclusion
Replacing parts of a rigid box making machine is a task that requires careful planning and attention to detail. By following the steps outlined in this blog, you can replace parts safely and effectively, whether it's a simple belt or a complex cutting head. Remember to always prioritize safety, refer to the machine's manual, and perform regular maintenance.


If you're in the market for replacement parts or a new rigid box making machine, don't hesitate to reach out. We're here to help you find the best solutions for your box - making needs. Whether you need a Round Corner Cutting Machine, an Automatic Corner Pasting Machine, or an Automatic Cardboard Grooving Machines, we've got you covered. Contact us for more information and to start a procurement discussion.
References
- Manufacturer's manuals for Rigid Box Making Machines
- Industry best practices for machine part replacement