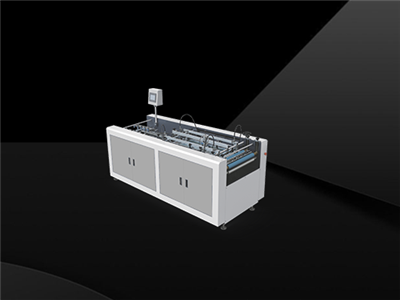

Changing the molds of a rigid box making machine is a crucial task that can significantly impact the efficiency and quality of your box production. As a reputable supplier of Rigid Box Making Machines, I understand the importance of this process and am here to guide you through it step by step.
Understanding the Need for Mold Change
Before delving into the process of changing molds, it's essential to understand why you might need to do so. There are several reasons for mold changes in a rigid box making machine:
- Product Variation: If you want to produce different sizes or styles of rigid boxes, you'll need to switch to the appropriate molds. For example, if you've been making small gift boxes and now want to produce larger shipping boxes, a mold change is necessary.
- Mold Wear and Tear: Over time, molds can wear out due to continuous use. This can lead to a decrease in the quality of the boxes produced. Replacing worn - out molds ensures that your boxes maintain a high standard of quality.
- Upgrading to New Designs: As consumer preferences change, you may need to introduce new box designs. New molds are required to bring these designs to life.
Pre - Change Preparations
Before starting the mold change process, you need to make some preparations:


- Gather the Right Tools: You'll need a set of tools such as wrenches, screwdrivers, and measuring devices. Make sure these tools are in good condition and of the correct size for your machine.
- Review the Machine Manual: Every rigid box making machine is different, and the manufacturer's manual provides specific instructions for mold changes. Read through it carefully to understand the machine's requirements and safety precautions.
- Inspect the New Molds: Before installation, inspect the new molds for any damage or defects. Check the dimensions to ensure they match the specifications of your production requirements.
Step - by - Step Mold Change Process
Step 1: Machine Shutdown
The first and most important step is to shut down the rigid box making machine. Turn off the power supply and ensure that all moving parts have come to a complete stop. This is a safety measure to prevent any accidents during the mold change process.
Step 2: Remove the Old Molds
- Locate the Mold Fastening Points: Refer to the machine manual to find the locations where the old molds are fastened. These are usually secured with bolts or clamps.
- Loosen the Fasteners: Use the appropriate tools to loosen the bolts or clamps that hold the old molds in place. Be careful not to damage the machine or the molds during this process.
- Remove the Old Molds: Once the fasteners are loosened, carefully lift the old molds out of the machine. Place them in a safe area for storage or disposal.
Step 3: Clean the Machine
After removing the old molds, clean the mold mounting area of the machine. Remove any debris, dust, or residue that may have accumulated. A clean mounting surface ensures a proper fit for the new molds and can improve the overall performance of the machine.
Step 4: Install the New Molds
- Position the New Molds: Carefully place the new molds in the mounting area of the machine. Make sure they are aligned correctly according to the machine's markings or the instructions in the manual.
- Secure the Molds: Use the bolts or clamps to fasten the new molds tightly in place. Ensure that the molds are firmly attached to prevent any movement during operation.
- Check the Alignment: Use measuring tools to double - check the alignment of the new molds. Proper alignment is crucial for the accurate production of rigid boxes.
Step 5: Test the Machine
Once the new molds are installed, it's time to test the machine. Turn on the power supply and run a test cycle with a small number of materials. Observe the operation of the machine and the quality of the boxes produced. If there are any issues, such as misaligned boxes or uneven cuts, make the necessary adjustments to the molds or the machine settings.
Tips for a Smooth Mold Change
- Keep a Record: Maintain a record of all mold changes, including the date, the type of molds installed, and any issues encountered. This record can be useful for future reference and maintenance.
- Train Your Staff: Ensure that your staff is properly trained in the mold change process. This will not only improve the efficiency of the process but also reduce the risk of errors.
- Regular Maintenance: Conduct regular maintenance on your molds to extend their lifespan. This includes cleaning, lubrication, and inspection for wear and tear.
Related Machines in Rigid Box Production
In addition to changing molds in a rigid box making machine, you may also be interested in other machines that can enhance your box production process. We offer a range of related machines, such as Automatic Cardboard Grooving Machines, Semi Auto Corner Pasting Machine, and Automatic Corner Pasting Machine. These machines can work in conjunction with your rigid box making machine to improve the overall quality and efficiency of your box production.
Contact Us for More Information
If you have any questions about changing the molds of a rigid box making machine or are interested in purchasing our machines, please don't hesitate to contact us. Our team of experts is ready to provide you with professional advice and support. Whether you need assistance with mold selection, machine installation, or maintenance, we are here to help.
References
- Manufacturer's manual of the rigid box making machine
- Industry best practices for mold change in box making machines