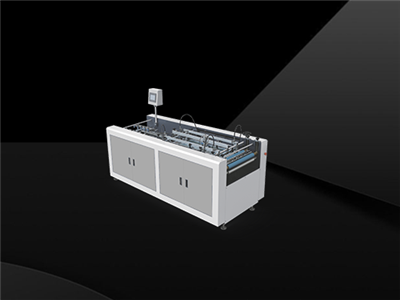

As a rigid box supplier, I've faced my fair share of challenges when it comes to ensuring the alignment of printed designs on these boxes. It's a crucial aspect that can make or break the overall look and quality of the final product. In this blog, I'll share some of the key steps and techniques I've learned over the years to achieve precise alignment and create stunning rigid boxes.
Understanding the Basics of Rigid Box Printing
Before we dive into the alignment process, it's important to have a basic understanding of how rigid box printing works. Rigid boxes are typically made from thick cardboard or paperboard, which provides a sturdy and durable structure. The printing process involves applying ink or other decorative elements to the surface of the box using various techniques such as offset printing, digital printing, or screen printing.
The design is first created using graphic design software and then transferred to a printing plate or digital file. The printing plate or file is then used to print the design onto the box material. The alignment of the printed design is crucial to ensure that it is centered, straight, and properly positioned on the box.
Pre-Press Preparation
One of the most important steps in ensuring the alignment of printed designs on rigid boxes is pre-press preparation. This involves a series of tasks that are performed before the actual printing process begins. Here are some key pre-press steps to consider:
Design Creation and Proofing
The first step in pre-press preparation is to create the design for the rigid box. This involves working with a graphic designer to create a layout that is visually appealing and meets the client's requirements. The design should include all the necessary elements such as text, images, logos, and colors.
Once the design is created, it's important to proof it before printing. This involves creating a sample print or digital proof to check for any errors or issues with the design. The proof should be carefully reviewed to ensure that the alignment of the design is correct and that all the elements are properly positioned.
Box Template and Layout
Another important aspect of pre-press preparation is creating a box template and layout. The box template is a digital file that defines the dimensions and shape of the rigid box. It includes all the necessary folds, cuts, and scores that are required to assemble the box.
The layout is a digital file that shows how the design will be positioned on the box template. It includes all the necessary registration marks and guides to ensure that the design is properly aligned during the printing process. The layout should be carefully designed to ensure that the design is centered, straight, and properly positioned on the box.
Printing Plate Preparation
If you're using offset printing to print the rigid boxes, you'll need to prepare the printing plates. The printing plates are metal or plastic plates that are used to transfer the ink onto the box material. They are created using a process called plate making, which involves exposing the plate to light through a film negative of the design.
The printing plates should be carefully prepared to ensure that they are properly aligned and that the design is accurately transferred onto the box material. This involves checking the registration marks and guides on the plates to ensure that they match the layout of the design.
Printing Process
Once the pre-press preparation is complete, it's time to start the printing process. Here are some key steps to consider during the printing process:
Machine Setup
The first step in the printing process is to set up the printing machine. This involves adjusting the settings on the machine to ensure that the ink is applied evenly and that the design is properly aligned. The machine should be calibrated to the correct temperature, pressure, and speed to ensure optimal printing results.
Registration Marks and Guides
Registration marks and guides are essential for ensuring the alignment of the printed design on the rigid boxes. They are small marks or lines that are printed on the box material to indicate where the design should be positioned. The registration marks and guides should be carefully aligned with the layout of the design to ensure that the design is properly centered and straight.
Printing Quality Control
During the printing process, it's important to perform regular quality control checks to ensure that the printed design is of high quality and that the alignment is correct. This involves inspecting the printed boxes for any errors or issues such as smudging, bleeding, or misalignment. Any issues should be addressed immediately to prevent further problems.
Post-Press Assembly
Once the printing process is complete, the rigid boxes need to be assembled. Here are some key steps to consider during the post-press assembly process:
Folding and Gluing
The first step in the post-press assembly process is to fold the printed box material along the pre-scored lines. This creates the shape of the rigid box. The box should be folded carefully to ensure that the folds are straight and that the corners are sharp.
After the box is folded, it needs to be glued together. This involves applying a thin layer of glue to the edges of the box and then pressing the edges together. The glue should be allowed to dry completely before the box is handled.
Quality Control
During the post-press assembly process, it's important to perform regular quality control checks to ensure that the assembled boxes are of high quality and that the alignment of the printed design is correct. This involves inspecting the boxes for any errors or issues such as loose corners, uneven folds, or misaligned designs. Any issues should be addressed immediately to prevent further problems.
Using the Right Equipment
In addition to following the steps outlined above, using the right equipment is also crucial for ensuring the alignment of printed designs on rigid boxes. Here are some key pieces of equipment that can help:
Automatic Tape Pasting Machine
An Automatic Tape Pasting Machine is a machine that is used to apply tape to the corners of the rigid boxes. This helps to reinforce the corners and prevent them from coming apart. The machine can be programmed to apply the tape at a specific length and width, which ensures that the tape is properly aligned and that the corners are evenly reinforced.


Automatic Corner Pasting Machine
An Automatic Corner Pasting Machine is a machine that is used to apply glue to the corners of the rigid boxes. This helps to strengthen the corners and prevent them from coming apart. The machine can be programmed to apply the glue at a specific thickness and width, which ensures that the glue is properly aligned and that the corners are evenly reinforced.
Automatic Cardboard Grooving Machines
Automatic Cardboard Grooving Machines are machines that are used to create grooves in the cardboard or paperboard material. These grooves are used to make the box easier to fold and assemble. The machine can be programmed to create the grooves at a specific depth and width, which ensures that the grooves are properly aligned and that the box folds evenly.
Conclusion
Ensuring the alignment of printed designs on rigid boxes is a complex process that requires careful planning, preparation, and execution. By following the steps outlined in this blog and using the right equipment, you can achieve precise alignment and create stunning rigid boxes that meet the highest quality standards.
If you're interested in learning more about our rigid box printing and manufacturing services, please don't hesitate to contact us. We'd be happy to discuss your specific requirements and provide you with a free quote.
References
- "Printing Techniques for Rigid Boxes." Packaging World, 2023.
- "Pre-Press Preparation for Rigid Box Printing." Graphic Arts Monthly, 2023.
- "Post-Press Assembly of Rigid Boxes." Packaging Digest, 2023.